Update: We’ve made some small updates to the uploading process to make it even easier! Find out more here.
The thought of uploading tonnes of contacts at once can seem daunting…but it’s really not, uploading contacts is a breeze – trust me!
Let’s get your first group set up…
STEP 1: Head to the CONTACTS tab in your account and click ADD CONTACTS
STEP 2: Here’s where you ADD A NEW GROUP or select an existing group from the drop-down list
You can name your group whatever you like! The FROM box is your senderID (No more than 11 alphanumeric characters)
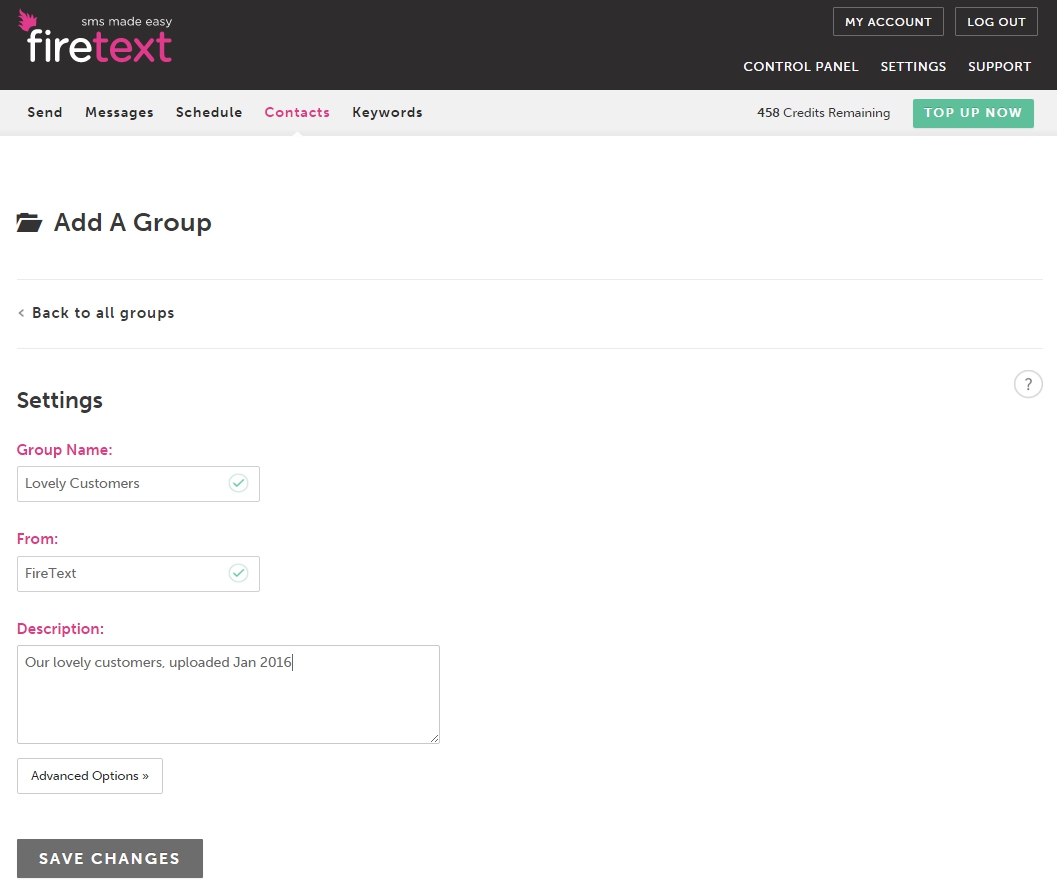
If you don’t have a group description, not to worry, you can just pop the name of the group in the description box (this is just to remind you what the group is for)
STEP 3: When you’re happy you can SAVE CHANGES and you’ve created a new group 🙂
Now you can start adding some numbers!
Your new group should already be selected in the select a group box
STEP 4: Make sure the upload CSV option is ticked if uploading a file, if you want to manually enter your numbers tick the copy and paste option
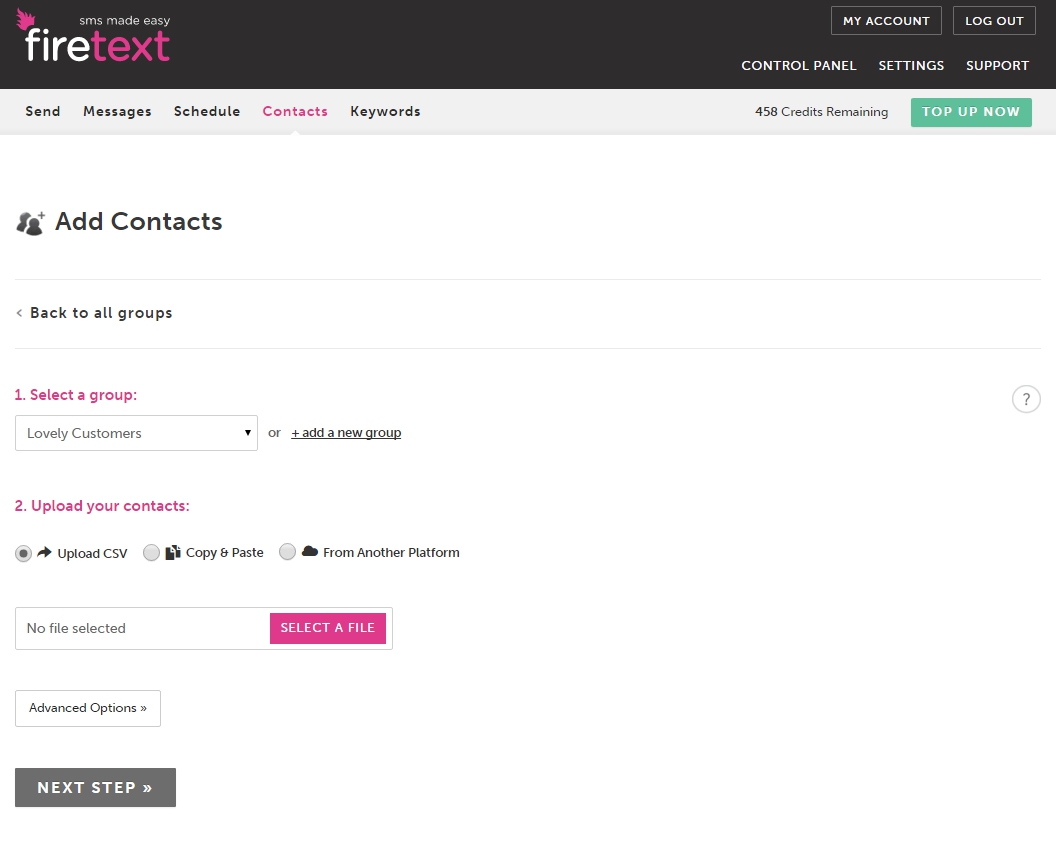
STEP 5: Now select your file, or enter your numbers and hit NEXT STEP
STEP 6: Here a MATCH COLUMNS box will appear, this just gives you a chance to confirm that your data is under the appropriate column headings
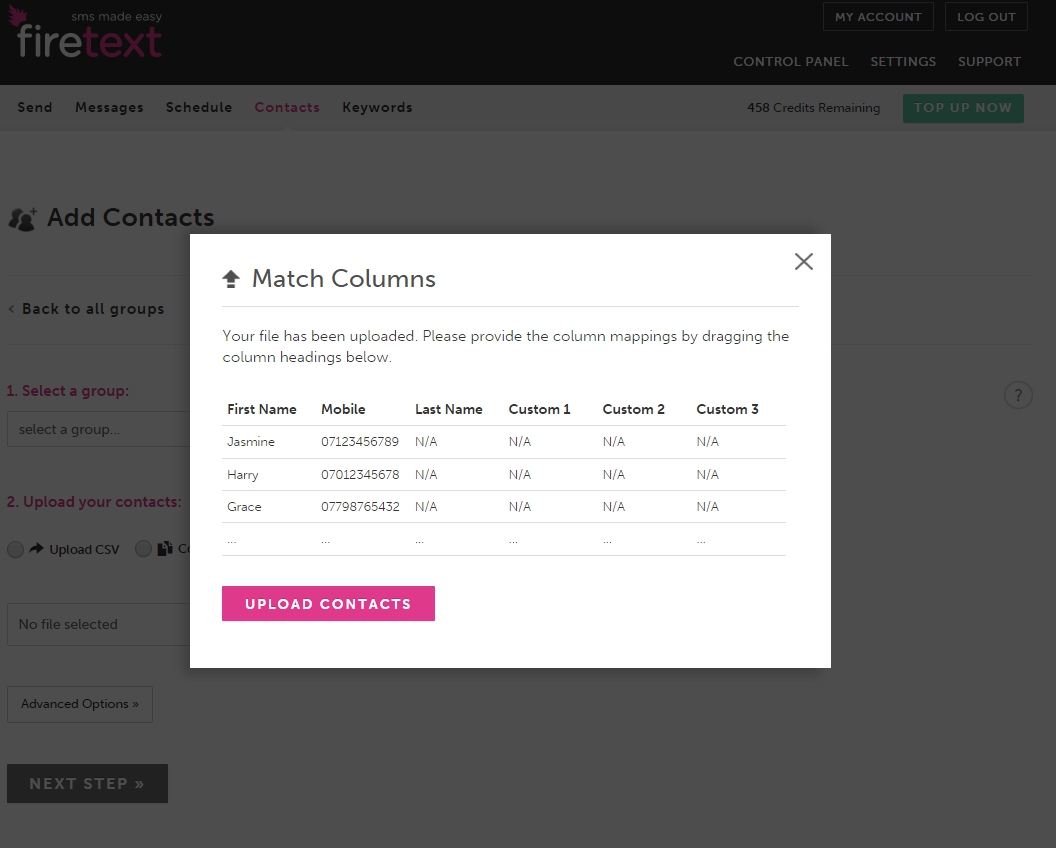
STEP 7: When you’re happy click UPLOAD CONTACTS and you’re done 🙂